Three Things to Master in Revu to Elevate Your Studio Sessions
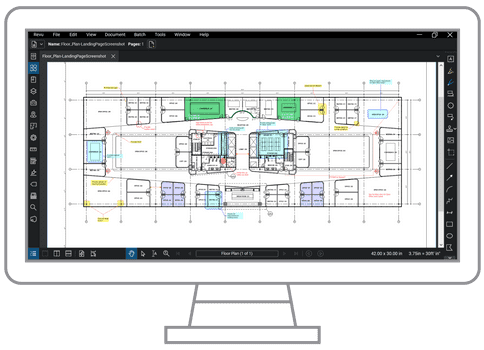
Bluebeam Revu has for many years been among the top software programs for professionals in the architecture, engineering and construction (AEC) industry. It allows users to view, mark up and edit PDF documents in a manner that is exponentially more organized and efficient than the former paper-based process. And with the release of Revu 20, users now have enhanced capabilities at their disposal.
Now, as remote working arrangements have become more common, more Revu users have become privy to the digital collaboration capabilities within the technology—namely Studio Sessions, which allows users to communicate, in real time, for document reviews and approvals.
While most Revu users may intuitively jump into a Studio Session, there are a few things they should first master in Revu.
“You can easily jump into Sessions and annotate what you need to annotate in a standard manner. That will basically help you avoid sending emails,” said Jonathan Guibert, an account manager and Bluebeam Instructor for AEC with SolidCAD in Montreal, Quebec. “But at the end of the day they will not be as organized and efficient as they should be.”
These are the three things in Bluebeam Revu that Guibert said must be organized before diving into a Studio Session.
Create a Custom Profile
Building a Custom Profile in Revu allows users to store toolbars, menus and other display settings. In short, profiles can be used to shape the user interface of Revu for common job functions within an organization.
Some users, for instance, may only need to view, not edit, documents, so a Custom Profile allows them to see an interface that offers them tools relevant to that function. On the other hand, job functions that require more extensive use of the editing features in Revu may require a completely different interface.
Guibert said having a Custom Profile established before collaborating in a Session will ensure that the interface most relevant for a given job role will appear throughout the Session. This way there’s less clutter on the screen so users can make the most of their digital collaboration experience. Additionally, a lighter interface will help users focus on tools they need to use instead of having to search for them.
Build a Tool Chest
As with profiles, users should create Custom Markups as an extension to their Tool Chests in Revu. This allows users to standardize the way they’re communicating. It also keeps frequently used markup tools available for use and reuse.
The Tool Chest automatically remembers recently used markups, can reapply a markup in its entirety and automatically scales tools to fit different drawings—all without having to recreate the tool to match the drawing’s scale.
“You need to have a unified Tool Chest to be able to communicate internally as well as externally” within a Studio Session, Guibert said. This way everyone in the Session is essentially working off the same standard when annotating and reviewing documents.
Know and Use the Markups List
The Markups List in Revu automatically tracks markups placed on a PDF. This includes a markup’s author, date, color and any comments associated with each markup.
Knowing how to use the Markups List is paramount to using Studio Sessions, according to Guibert, because it’s the clearest way for everyone to see an organized log on each and every markup, who’s making the markup and any notes or comments that are associated with any comment made to the document. With Custom Statuses created before the Session, project collaborators are able to set, track and export approvals on any task requested via a markup.
“You need to know that you have gathered all information in the Markups List, and you need at the same time to have this Markups List organized in order to be able to export data as you want it to be exported,” Guibert said.
Bonus Tip: Clarify Objectives
Once those Revu capabilities are in place, it’s important that users ensure that each Studio Session they engage in has a clear objective.
As Guibert said he’s observed, Sessions created without a clear objective tend to run amok, with multiple Sessions ongoing for different aspects of a project. This leads to confusion and lack of direction.
Instead, users should establish clear objectives for each individual Session to ensure that there’s no confusion so that goals are eventually met and the Session can end before starting a new one for another project objective.
With these three Revu functionalities in place—as well as the goal of having clear objectives—users will be able to more effectively use Studio Sessions by having a more efficient interface that includes the right tools for each task users need to perform.
From there, users can make the most of their digital collaboration in an increasingly remote working world.
For more information on how to get the most out of Bluebeam Revu or to download a free trial, visit TPM’s website.


Note: This story was originally published by Bluebeam, Inc. on the Bluebeam Blog.


